Note: Your Access Level may restrict the use of some features.
For the App, see Adding Hazards or Items (App).
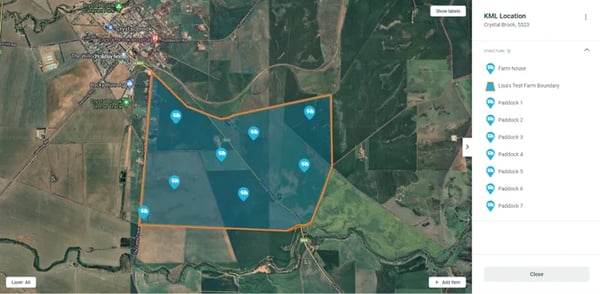
Hazards and other items can be added to a location map with a precise geo-location, or they can simply be listed against a Location if they do not have an precise position.
You should add Hazards that your staff need to be aware of. Start with significant hazards; e.g. chemical shed, powerlines, power poles, dams.
You can also add a wide range of items such as structures, fuel tanks, trees, assembly areas.
Note: A Location must be added before hazards and items can be added to it.
Adding a Hazard or Item
- From the left menu, select Business > Locations, and select the Location.
- Hazards or Items can be added in two ways. Click on the Location to open in, then:
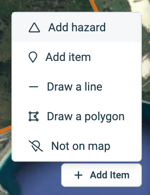
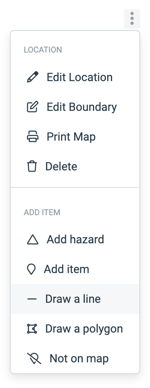
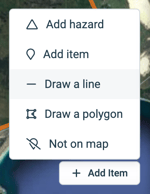
- Click more options
 in the top right hand corner and select Add Hazard or Add Item.
- Click + Add Item button in the bottom right corner of the map and select Add Hazard or Add Item.
- Click more options
- Place a marker on the map in the position of the Hazard or Item.
- Complete the details in the right panel.
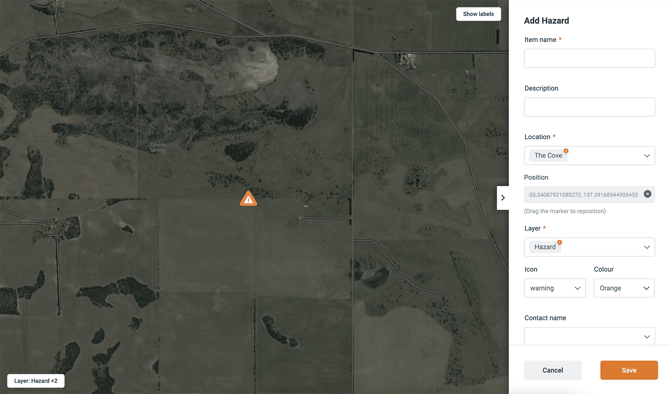
- Click Save.
Adding a Line Item
- From the left menu, select Business > Locations, and select the Location.
- Hazards or Items can be added in two ways. Click on the Location to open in, then:
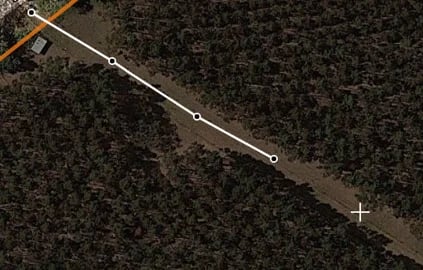
- Click more optionsin the top right hand corner and select Draw a line.
- Click + Add item in the bottom right corner of the map and select Draw a line.
- Click more options
- Click on the map (with the cross hair) to add the first point of the line, and then keep adding points as required to draw the line. Once the line has been completed, click Done.
- Complete the details in the right panel.
- Click Save.
Importing an item from a KML or CSV file
Note: A Location must be added and a boundary drawn before items can be imported.
Prior to importing items from a .kml or .csv file, you must ensure it is formatted as described below:
- The file must have 4 columns titled:
- Name - this is required and must be a unique name to that hazard or item.
eg. Power Pole 3. - Category - optional description of the item/hazard.
- LAT (Latitude) and LNG (Longitude) - must either be BOTH populated or unpopulated. If only one of these two fields is populated there will be an error message when upload is attempted. Blank rows between items will upload a non-mapped item.
- Name - this is required and must be a unique name to that hazard or item.
- Click Import Items in the top right corner of Locations.
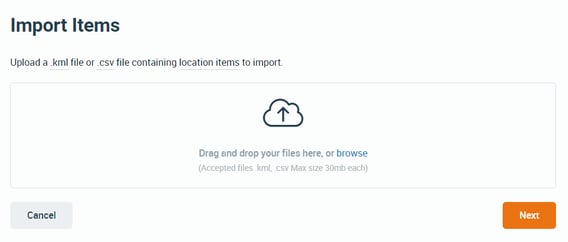
- Drag and drop the file from your computer into the box, or click to browse your files.
- Click Next for a list of items to appear - items can be polygons or points.
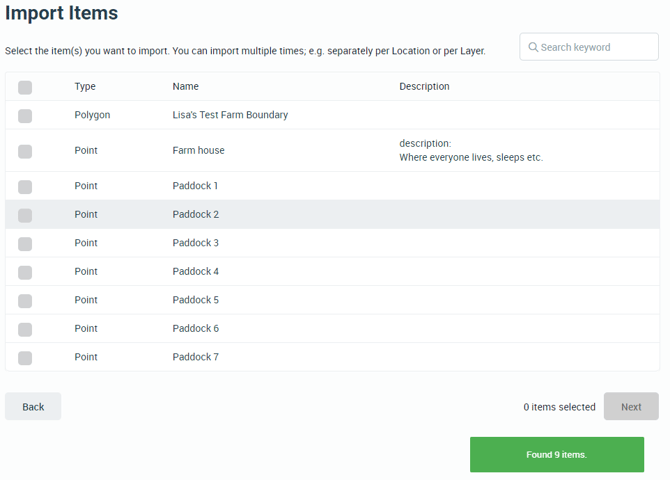
- The file will display individual items in lines. You will need to repeat the import process for each item or group of items to be saved to an individual layer in your Location, eg. import all Structures, then import all Hazards.
- Tick the checkbox next to the item(s) to import, and click Next.
- An Import Items screen will appear. Use the dropdown fields to set the Location, Layer and display preferences (Line colour and fill colour for polygons, Colour and Icon for points).
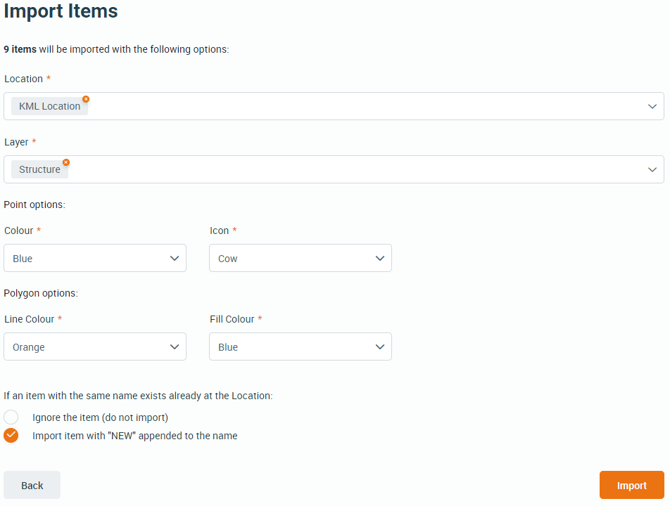
- Click Import.
- Items that were imported will appear on the map.