Note: Your Access Level may restrict the use of some features.
Editing an Induction can only be done on Desktop.
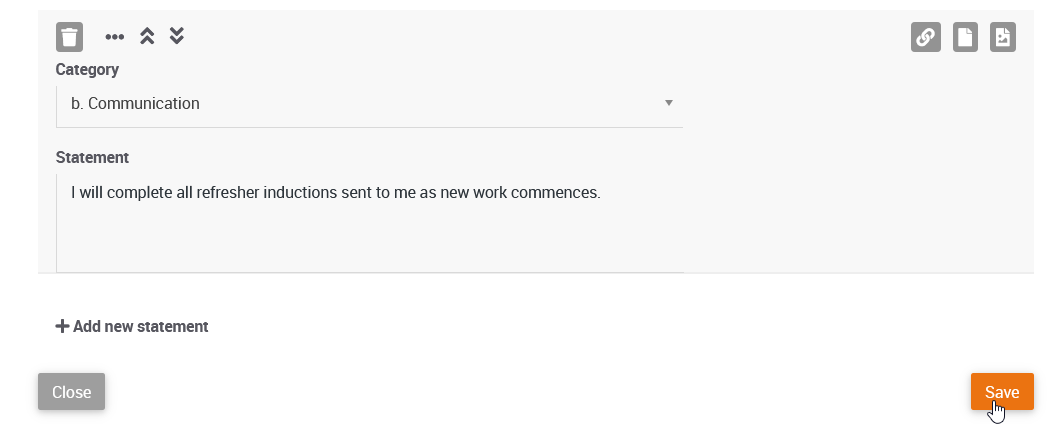
Editing an Induction
- From the left menu, select Documents > Inductions.
- Click Edit on the required induction.

- To edit an existing Category or Statement, click within the text box.
- To add a new statement, click + Add new statement.
- Click Save when complete. When removing a linked image, Policy or link, this change will go live immediately. If anyone was assigned the Induction but hadn’t completed it, this should be manually archived and re-assigned to avoid issues.
Formatting Options
Once a Link, Policy or Image has been added, the icon will appear blue.
Link
To add a link on a statement, click the link icon. Enter a description and the URL. Click Save.
To remove a link, click the link icon and click Delete. 
Policy
To add a Policy on a statement, click the Policy icon, and select the published Policy.
To remove a linked Policy, click the Policy icon, and pick Select a Statement. 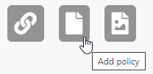
Image
To add an image on a statement, click the Image icon. Add a Caption and click Choose File and upload the image. Click Save.
To remove an image, click the Image icon and click Delete.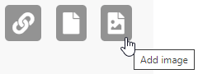
Deleting a Statement
Click the Trash Can on the statement. Click OK to confirm.![]()
Moving a Statement
Click the Drag and Drop ![]() button or use the up/down arrows.
button or use the up/down arrows.![]()