Note: Your Access Level may restrict the use of some features.
Builder and Library Elements are used to build a Checklist or Audit template.
Builder Elements are made up of:- Content Elements are used to show information or instructions, or formatting options, and
- Response Elements are used to collect information from the user.
- User Library elements are Builder Elements that have been customised by the user and saved to be used again, and
- System Library elements are elements that have been used repeatedly by the user and then auto-saved to the system library.
Builder Elements
| Content Elements | Response Elements |
|
Adding Elements
- To use an element, drag and drop the element into the checklist from the Library on the right-hand side.

- For most elements, a pop-up will appear and allow the element to be configured.

- Response elements may include the options of:
- Required - the Checklist or Audit can't be submitted without responding.
- Display options inline - Display answers horizontally instead of vertically.
Editing Elements
To edit an element, select from the options in the top right corner.
 Apply Conditional Logic (not available for all elements)
 Edit
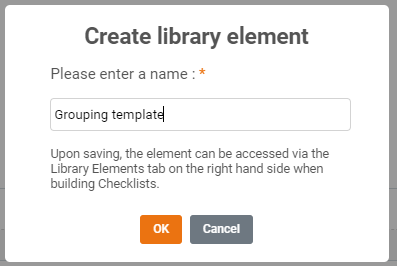
Edit  Save as Library Element - save under the Library Elements tab. Allows it to be added into the template multiple times, without needing to be re-created.
 Delete
  Copy
Copy
Content Elements
Content elements are used to show information or instructions, or formatting options.
-
Headings
Use headings to make text stand out, select from 3 heading sizes.
-
Paragraph
A body of text within the template, this could be an introduction and/or instructions for completing the Document.
-
External Link
Link to an external website, video or document with a URL.
-
Image
Insert any images so they will be displayed when completing the document.
-
SAS Documents (Checklists only)
Attach any of your Safe Ag Systems Policies or Procedures.
-
PPE
Select from a range of PPE icons to be shown.
-
Video Embed (Checklists only)
Use a YouTube or Vimeo embed code to have a video built into the Checklist.
-
Separator
Separate the content of your checklist into different sections by inserting a solid, dashed or dotted line.
-
Page Break
Use a Page Break to split the document into different pages when being completed.
-
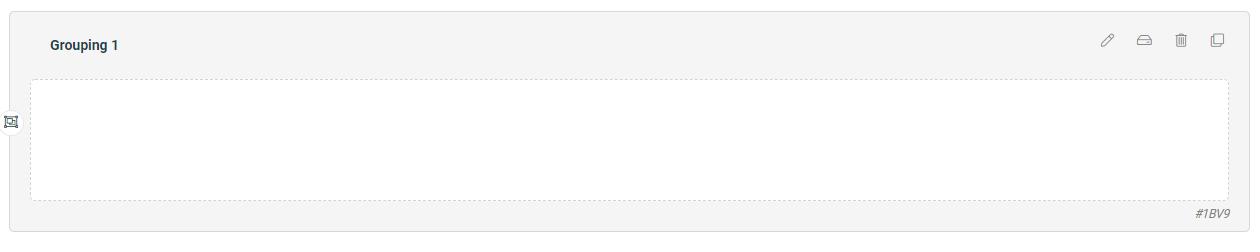
Group (Checklists only)
Elements can be grouped together on the form so that a border can be drawn around them and the background can be coloured differently.
-
- Create a group by dragging and dropping the element into the Checklist. You can choose your background colour. While building the Checklist, the colour will be grey until previewed & published.
- Drag additional elements into the box to ensure that they are included in the group.
- Create a group by dragging and dropping the element into the Checklist. You can choose your background colour. While building the Checklist, the colour will be grey until previewed & published.
If a large document is being created using multiple groups, they can be saved as a Library Element to ensure consistency. Click the  icon in your grey groups box to save it.
Response Elements
Response Elements are used to collect information. They can be set as required, so the document can't be submitted without key information.
-
Record Repeater
Use a Record Repeater, with a set of response elements, to allow users to add multiple records as needed.
Using the Record Repeater
- Create the Record Repeater by dragging it from Builder Elements into the body.
- Fill in the prompt with the question/statement that requires an answer.
- Set the minimum number of records required.
- Drag response elements into the Record Repeater box.
- Once the Document has been published the Record Repeater will display an Add Record button. The user will be able to add additional response fields when running the checklist.

-
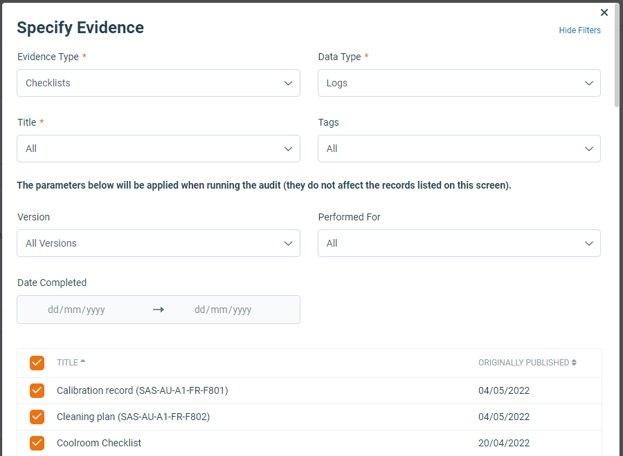
Link Evidence (AgAuditor only)
Enables evidence to be linked from within the Safe Ag Systems platform. When run, the Audit will pull evidence into the Audit document without needing to set it up each time.
Using Link Evidence
- Create the Link Evidence by dragging it from Builder Elements into the body.
- Fill out the prompt with the overarching question/statement.
- Select + Specify Evidence, and fill out any required fields to set the evidence to be shown.
Evidence Options:
| Checklists | Inventory | Policies | Procedures |
| Document Logs Completed Document |
Details Maintenance Records |
Document Acceptance Logs |
Document Acceptance Logs |
-
Text Field
Allows a written response.
-
Date
Provides a calendar popup for a date to be entered.
-
Number Field
Allows a number to be entered. A minimum or maximum number can be set.
-
Dropdown List
Creates a dropdown list of pre-set answers to be selected. Allows a single response. Best suited for a large number of answers.
-
Checkboxes
Creates a list of pre-set answers, where multiple can be selected.
-
Radio Buttons
Creates a list of pre-set answers, only one can be selected. Best suited for a small number of responses.
-
File Upload
Allow the submitter to upload a file. Allows a range of file types, including images, videos, Word or Excel documents, PDF's and more.
-
Signature
Have the user sign the document before submission.
-
Draw
Upload an image that can have a response drawn on to it by the person completing the document.
-
Add Task
If further actions are required, have an "Add Task" button display.
-
SAS Record
Use SAS Record to automatically create a list based on existing system data. System areas included are People, Machinery & Equipment, Tools, Structures, Chemicals and Locations.